Build AI-Native SaaS with Nile and Prisma
In this tutorial, you will learn about Nile's tenant virtualization features, while building a todo list application. We'll use Prisma as the ORM to interact with the database, OpenAI client to work with AI models, and Express as the web framework.
Nile will provide us with virtual-tenant databases - isolating the tasks for each tenant, and we'll use the AI models to generate automated time estimates for each task in the todo list. The estimates will be based on the task title, and estimates of similar tasks in the tenant's history. This technique is known as RAG architecture.
1. Create a database
- Sign up for an invite to Nile if you don't have one already
- You should see a welcome message. Click on "Lets get started"
- Give your workspace and database names, or you can accept the default auto-generated names. In order to complete this quickstart in a browser, make sure you select to “Use Token in Browser”.
2. Create a table
After you created a database, you will land in Nile's query editor. Since our application requires a table for storing all the "todos" this is a good time to create one:
  CREATE TABLE IF NOT EXISTS "todos" (
    "id" uuid DEFAULT gen_random_uuid(),
    "tenant_id" uuid,
    "title" varchar(256),
    "estimate" varchar(256),
    "embedding" vector(768),
    "complete" boolean,
    CONSTRAINT todos_tenant_id_id PRIMARY KEY("tenant_id","id")
  );
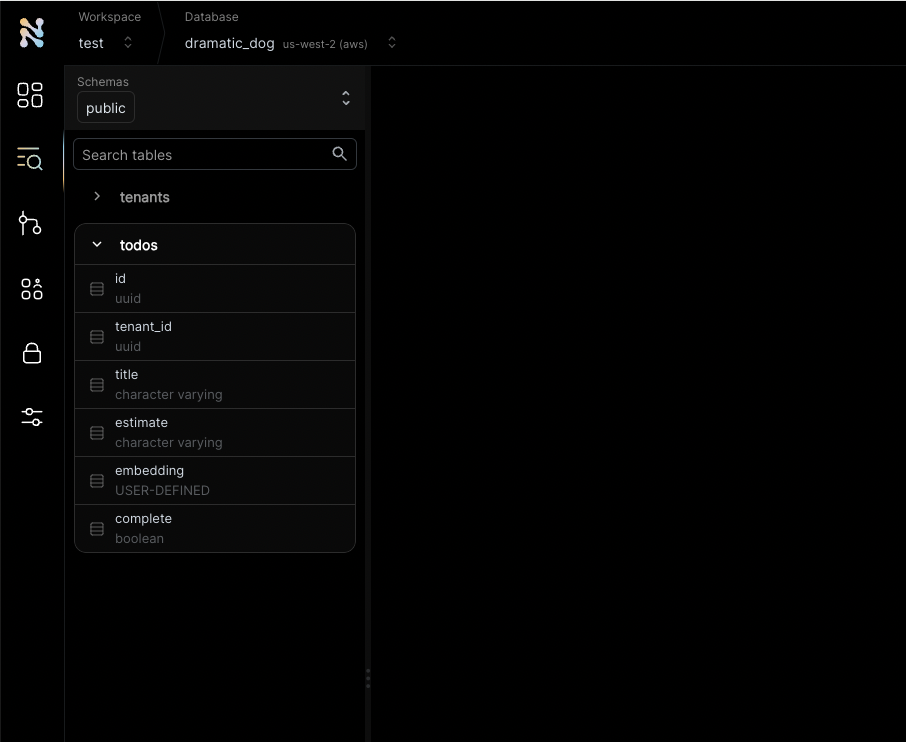
You will see the new table in the panel on the left side of the screen, and you can expand it to view the columns.
The embedding column is a vector representation of the task. When the user adds new tasks, we will use these embeddings to find semantically related tasks and use this as a basis of our AI-driven time estimates. This technique - looking up related data using embeddings and using this data with text generation models is a key part of RAG (Retrieval Augumented Generation).
See the tenant_id column? By specifying this column, You are making the table tenant aware. The rows in it will belong to specific tenants. If you leave it out, the table is considered shared, more on this later.
3. Get credentials
In the left-hand menu, click on "Settings" and then select "Connection".
Click on the Postgres button, then click "Generate Credentials" on the top right corner. Copy the connection string - it should now contain the credentials we just generated.
4. 3rd party credentials
This example uses AI chat and embedding models to generate automated time estimates for each task in the todo list. In order to use this functionality, you will need access to models from a vendor with OpenAI compatible APIs. Make sure you have an API key, API base URL and the names of the models you'll want to use.
5. Set the environment
Enough GUI for now. Let's get to some code.
If you haven't cloned this repository yet, now will be an excellent time to do so.
git clone https://github.com/niledatabase/niledatabase
cd niledatabase/examples/quickstart/prisma
Rename .env.example to .env, and update it with the connection string you just copied from Nile Console and the configuration of your AI vendor and model.
Make sure you don't include the word "psql". It should look something like this:
DATABASE_URL=postgres://018b778a-30df-7cdd-b55c-2f9664db39f3:ff3fb983-683c-4616-bbbc-519d8ddbbce5@db.thenile.dev:5432/gwen_db

# for AI estimates
AI_API_KEY=your_api_key_for_openai_compatible_service
AI_BASE_URL=https://api.fireworks.ai/inference/v1
AI_MODEL=accounts/fireworks/models/llama-v3p1-405b-instruct
EMBEDDING_MODEL=nomic-ai/nomic-embed-text-v1.5
Install dependencies with yarn install or npm install.
npm install
6. Run the application
Start the web service with npm start or yarn start.
Now you can use curl to explore the APIs. Here are a few examples:
# create a tenant
curl --location --request POST 'localhost:3001/api/tenants' \
--header 'Content-Type: application/json' \
--data-raw '{"name":"my first customer", "id":"108124a5-2e34-418a-9735-b93082e9fbf2"}'

# get tenants
curl  -X GET 'http://localhost:3001/api/tenants'

# create a todo (don't forget to use a read tenant-id in the URL)
curl  -X POST \
  'http://localhost:3001/api/tenants/108124a5-2e34-418a-9735-b93082e9fbf2/todos' \
  --header 'Content-Type: application/json' \
  --data-raw '{"title": "feed the cat", "complete": false}'

# list todos for tenant (don't forget to use a read tenant-id in the URL)
curl  -X GET \
  'http://localhost:3001/api/tenants/108124a5-2e34-418a-9735-b93082e9fbf2/todos'

# list todos for all tenants
curl  -X GET \
  'http://localhost:3001/insecure/all_todos'
6. Check the data in Nile
Go back to the Nile query editor and see the data you created from the app.
SELECT tenants.name, title, estimate, complete
FROM todos join tenants on tenants.id = todos.tenant_id;
You should see all the todos you created, and the tenants they belong to.
7. How does it work?
Lets walk through key parts of the application, so you'll learn how it works and how to adopt the example to your use-cases.
7.1 Working with Prisma data models
This example uses Prisma as the ORM. Prisma, like most ORMs, works by mapping the relational model in the database to an object model in the application. When you cloned the example, you got a Prisma schema file that contains definitions for key tables (such as tenants and todos) and their relationships.
This file is used to generate the Prisma client, which is used by the application to interact with the database. It can also be used to generate the database schema, but in this example we already created it in the Nile Console.
We generated the schema file from the database using the following commands:
  npx prisma init
  npx prisma db pull
This is also known as Prisma's "introspection" feature. Because Prisma does not yet support pg_vector extension
and the vector data type, we had to manually add the vector column to the schema file:
model todos {
  id        String   @default(dbgenerated("gen_random_uuid()")) @db.Uuid
  tenant_id String   @db.Uuid
  title     String?  @db.VarChar(256)
  estimate  String?  @db.VarChar(256)
  // Prisma doesn't support vector types yet: https://github.com/prisma/prisma/issues/18442
  embedding Unsupported("vector(768)")?
  complete  Boolean?

  @@id([tenant_id, id], map: "todos_tenant_id_id")
  @@schema("public")
}
We then generated a Prisma client with:
    npm install @prisma/client
    npx prisma generate
7.2 Querying tenant databases
Once we have a Prisma client, we can use it to run queries. For example, lets look at how we queried the database for a list of todos for a specific tenant:
const tenantDB = tenantContext.getStore();
// No need for a "where" clause here because we are setting the tenant ID in the context
const todos = await tenantDB?.todos.findMany();
res.json(todos);
The query looks like a regular Prisma query, but it's actually running against a tenant database, which is why it doesn't need to filter the todos.
As you can see in the snippet above, we are getting the tenant database from tenantContext, lets take a look at what is this context and how it is managed.
We also have queries that use the embedding column with the vector data type. This column is used to store embeddings for each task, which are used to generate automated time estimates for each task in the todo list.
Because Prisma does not yet support the vector data type, we need to use Prisma's executeRaw and queryRaw methods to work with this column.
We'll show the example in the next section when we talk about the use of AI models to generate time estimates.
After this small detour, we'll get back to the tenant context and how to use Prisma with virtual tenant databases.
7.3 Using AI models to estimate time to complete tasks
This example uses AI chat and embedding models to generate automated time estimates for each task in the todo list. We handle the time estimates in
the route handler for app.post("/api/tenants/:tenantId/todos". This handler executes when users add new tasks.
This is what the handler code looks like:
const tenantDB = tenantContext.getStore();
// ... some setup redacted...
// We are using tenantDB with tenant context to ensure that we only find tasks for the current tenant
const similarTasks = await findSimilarTasks(tenantDB, title);
console.log("found similar tasks: " + JSON.stringify(similarTasks));

const estimate = await aiEstimate(title, similarTasks);
console.log("estimated time: " + estimate);

// get the embedding for the task, so we can find it in future similarity searches
const embedding = await embedTask(title, EmbeddingTasks.SEARCH_DOCUMENT);
console.log("tenant_id: " + tenantId);

// This is safe because Nile validates the tenant ID and protects against SQL injection
const newTodo = await tenantDB.$queryRawUnsafe(
  `INSERT INTO todos (tenant_id, title, complete, estimate, embedding) VALUES ('${tenantId}', $1, $2, $3, $4::vector)
  RETURNING id, title, complete, estimate`,
  title,
  complete,
  estimate,
  embeddingToSQL(embedding)
);

res.json(newTodo);
As you can see, we look up similar tasks and then use the AI model to generate the estimate. We then store the task, with the estimate and the task embedding in the database.
The stored embedding will be used to find similar tasks in the future. The methods findSimilarTasks, aiEstimate and embedTask are all defined in AiUtils.ts.
They are wrappers around standard AI model calls and database queries, and they handle the specifics of the AI model we are using.
This will make it easy to switch models in the future.
Note that when we save the todo with the estimate and embedding, we use tenantDB.$queryRawUnsafe to insert the data.
This is because Prisma does not yet support the vector data type, so we need to go a bit lower level.
Getting similar tasks is done by querying the database for tasks with similar embeddings:
const embedding = await embedTask(title, EmbeddingTasks.SEARCH_QUERY);

// get similar tasks, no need to filter by tenant because we are already in the tenant context
const similarTasks =
  await tenantNile.$queryRaw`SELECT title, estimate FROM todos WHERE
    embedding <-> ${embeddingToSQL(
      embedding
    )}::vector < 1 order by embedding <-> ${embeddingToSQL(
    embedding
  )}::vector limit 3`;

console.log(` found ${similarTasks.length} similar tasks`);

return similarTasks;
We started by generating an embedding with SEARCH_QUERY task type. This is because we are looking for
similar tasks to the new task. We use an embedding model from the nomic family, which is trained to perform specific types of embedding tasks. Telling it that we are generating the embedding for a lookup vs
generating an embedding that we will store with the document (as we'll do in a bit), should help the model produce more relevant results.
We use queryRaw to run the query because Prisma does not yet support the vector data type, and we need to use both the
embedding column, and the <-> cosine distance operator in order to find the most similar tasks.
As you can see, we filter out results where the cosine distance is higher than 1. The lower the cosine distance is, the more similar the tasks are (0 indicate that they are identical). A cosine distance of 1 means that the vectors are essentially unrelated, and when cosine distance is closer to 2, it indicates that the vectors are semantically opposites.
The embedTask function uses the embedding model to generate the embedding and is a very simple wrapper on the model:
let resp = await ai.embeddings.create({
  model: EMBEDDING_MODEL,
  input: adjust_input(title, task),
});
Now that we have the similar tasks, the handler calls aiEstimate to generate the time estimate.
This function also wraps a model, this time a conversation model rather than an embedding model. And it icludes the similar tasks in the promopt, so the model will
generate similar estimates:
const aiEstimate = await ai.chat.completions.create({
  messages: [
    {
      role: "user",
      content: `you are an amazing project manager. I need to ${title}. How long do you think this will take?
        I have a few similar tasks with their estimates, please use them as reference: ${similarTasks}.
        respond with just the estimate, keep the answer short.`,
    },
  ],
  max_tokens: 64, // limit the response to 64 tokens
  model: model,
});
As you've seen at the start of this section when we reviewed the route handler for app.post("/api/tenants/:tenantId/todos", this estimate is then stored in the database along with the task and its vector embedding.
7.4 Tenant context
Tenant context uses AsyncLocalStorage to store a Prisma Client with additional tenant information.
AsyncLocalStorage is a Node.js feature that allows you to store data in a context that is local to the current execution flow.
const tenantContext = new AsyncLocalStorage<PrismaClient | undefined>();
We use Express middleware to get the tenant ID from the HTTP request, use it to initialize a Prisma client and set it in the context:
app.use((req, res, next) => {
  const fn = match("/api/tenants/:tenantId/todos", {
    decode: decodeURIComponent,
  });
  const m = fn(req.path);

  const tenantId = m?.params?.tenantId;
  console.log("setting context to tenant: " + tenantId);

  tenantContext.run(
    prisma.$extends(tenantDB(tenantId)) as any as PrismaClient,
    next
  );
});
tenantContext.run() stores the Prisma Client in a local storage, accessible from anywhere in the current request execution flow. The second argument is a callback function that will be executed after the context is set.
Since this is an Express middleware, the callback is the next middleware or request handler in the chain.
The only last bit to understand is the initialization of the Prisma Client with tenantDB.
7.5 Initializing the Prisma Client with tenant information
Lets take a look at the tenantDB object:
function tenantDB(
  tenantId: string | null | undefined
): (client: any) => PrismaClient<any, any, any, Types.Extensions.Args> {
  return Prisma.defineExtension((prisma) =>
    // @ts-ignore (Excessive stack depth comparing types...)
    prisma.$extends({
      query: {
        $allModels: {
          async $allOperations({ args, query }) {
            // set tenant context, if tenantId is provided
            // otherwise, reset it
            const [, result] = tenantId
              ? await prisma.$transaction([
                  prisma.$executeRawUnsafe(
                    `SET nile.tenant_id = '${tenantId}';`
                  ),
                  query(args),
                ])
              : await prisma.$transaction([
                  prisma.$executeRawUnsafe(`RESET nile.tenant_id;`),
                  query(args),
                ]);
            return result;
          },
        },
      },
    })
  );
}
While it looks a bit mysterious, it's actually quite simple. This function takes a tenant ID and returns a Prisma extension. The extension is a function that takes the Prisma Client as an argument and returns a new Prisma Client with additional functionality.
In this case, the additional functionality is to run every operation, for every model in the database, in a transaction that sets the tenant ID in the database session.
7.6 Tying it all together
Lets circle back to what happens when we call:
curl  -X GET \
  'http://localhost:3001/api/tenants/108124a5-2e34-418a-9735-b93082e9fbf2/todos'
First, the Express middleware extracts the tenant ID from the URL and creates a Prisma Client with an extension that will set the tenant ID in the database session before each operation.
It then uses AsyncLocalStorage to store the Prisma Client in a context that is local to the current request execution flow.
The request handler then uses the Prisma Client from the context to run a query against the database. Since the tenant ID is already set in the database session, the query doesn't need to filter the todos by tenant ID.
const tenantDB = tenantContext.getStore();
// No need for a "where" clause here because we are setting the tenant ID in the context
const todos = await tenantDB?.todos.findMany();
res.json(todos);
Other request handlers in the application use the same pattern to insert or update new todos for each tenant.
8. What's next?
This example is a good starting point for building your own application with Nile.
You have learned basic Nile, AI and RAG concepts and how to use them with Prisma.
You can learn more about Nile's tenant virtualization features in the following tutorials:
You can explore Nile's JS SDK in the SDK reference.
You can learn More about AI in Nile, or try a more advanced example like: